
Ultimate Troubleshooting Guide
When it comes to applying your custom heat transfers, there’s a lot that could potentially go wrong. And when you’re trying to meet a deadline, diagnosing the problem quickly is vital. This comprehensive guide will help you troubleshoot any heat printing problem and get you back to work so you can meet your deadline!
Before you continue, it’s important to understand why there can be such wide-ranging problems when heat printing. Your supplier provided a simple set of instructions – so those should work every time, right? Well, not quite. These instructions are a starting point. A baseline that most people will have success following. However, because there are a wide variety of heat press machines available on the market - ranging from manual clamshell “value” presses to fully pneumatic commercial grade presses - honing in on the settings that work for your press is very important.

Not all heat presses are created equal. This is why the application instructions included with your transfers are a starting point. You may need to adjust according the performance of your heat press.
For a successful print, you need to find the right combination of temperature, pressure, and dwell.
It’s important to understand that your transfers have been what’s called “gel-cured” during production by your transfer supplier. This means the ink is only semi-cured. Sort of like if you par-bake a pie crust for all you baking nerds out there! You are finishing the cure using your heat press when you apply the transfer to the garment. This is why we recommend using a high-quality heat press.
TIP: Most heat transfer suppliers will provide at least one extra transfer with every order. This is for you to use as a test print. If you suspect you may need to test more than once, you can cut the extra transfer into quarters.
Let’s get started!
Simply put, you can break down any application issue into one of two categories: over-applied or under-applied.
OVER-APPLIED
If your transfer has been over-applied, this means it was applied with either too much pressure, too much heat, too long of a dwell time, or any combination of these.
Identifying an over-applied transfer
When your transfer has been over-applied, the ink will hot-split. This means some ink will transfer onto the garment and some ink will be left on the carrier sheet. The ink on both the garment and the carrier will look spongey, not smooth.
This transfer was over applied using too much heat and pressure. Click to enlarge.
The transferred ink and the ink left on the carrier appear spongey. Click to enlarge.
Reasons your transfer was over-applied
1. Your heat press is running too hot
Check that your temperature read out is accurate using heat test strips or an infrared thermometer. If the top platen is reading a higher temperature than you have it set, you will need to compensate with a lower temperature setting.
2. Your pressure is too high
If your temperature is accurately set, you may need to pull back on the pressure. Most instructions will tell you to use either light, medium, or firm pressure. Ask your transfer supplier what the recommended pressure application is in psi or pounds per square inch.
3. The transfer was over-cured during production
It’s true – sometimes your heat transfer supplier will make a mistake. We’re all human, right? If you’ve ruled out the option that your application was over-applied due to your heat press being too hot or using too much pressure, you may want to check with your supplier. They can test-print an archived transfer and either confirm or rule out the possibility that it was over-cured during production.
UNDER-APPLIED
If your transfer has been under-applied, the ink will not completely adhere to the garment. Similar to an over-applied transfer, some ink will transfer onto the garment and some ink will be left on the carrier sheet. The biggest difference, however, will be the appearance of the ink. In this case, the ink will still look and feel smooth. You may be able to scratch or peel the transfer off the garment.
This transfer was under-applied and did not receive adequate temperature or pressure. Click to enlarge.
When applying halftones, you will want to use firm pressure to be sure all of the small dots transfer. Click to enlarge.
TIP: If your application is cracking after only a few washes, this is another indication that the transfer has been under-applied.
Reasons your transfer was under-applied
1. Your heat press is not reaching the correct temperature
Check that your temperature read out is accurate using heat test strips or an infrared thermometer. If you find that the actual temperature of your top platen is not hot enough, you will need to compensate with a higher setting.
2. Your pressure is too low
This is by far the most common issue we come across when helping customers diagnose application problems. Unfortunately, some of the value heat presses available on the market today aren’t equipped to provide the amount of pressure needed to apply professional quality custom heat transfers. This has become a growing problem with the ever-expanding use of transfers in the decorated apparel industry and the ease of purchasing affordable heat presses through sites like Amazon.
If you suspect this is your issue, you will want to add a Teflon pillow or even a mouse pad under your garment to raise the lower platen, in turn increasing the amount of pressure between the top and bottom platen. Make sure the pillow or pad is slightly larger than the transfer.
3. Your heat press provides inconsistent heat or pressure
If you’re using a starter heat press or your heat press is older, you may find that it no longer provides consistent heat or pressure. If you’re applying a full front transfer logo, you may notice that there is one area in which you repeatedly experience adhesion issues. This could mean one of two things: your heat press has a cold spot or there’s an area that isn’t getting enough pressure from the top platen.
Check your heat press for consistent pressure using the “Dollar Bill Test”. Okay, you can do this with any kind of paper, but dollar bills are the perfect size! Place pieces of paper hanging off your lower platen. Close the top platen and try tugging on the paper. If any of the sheets come out easily, this is an indication that there’s not enough pressure reaching that area of your heat press.
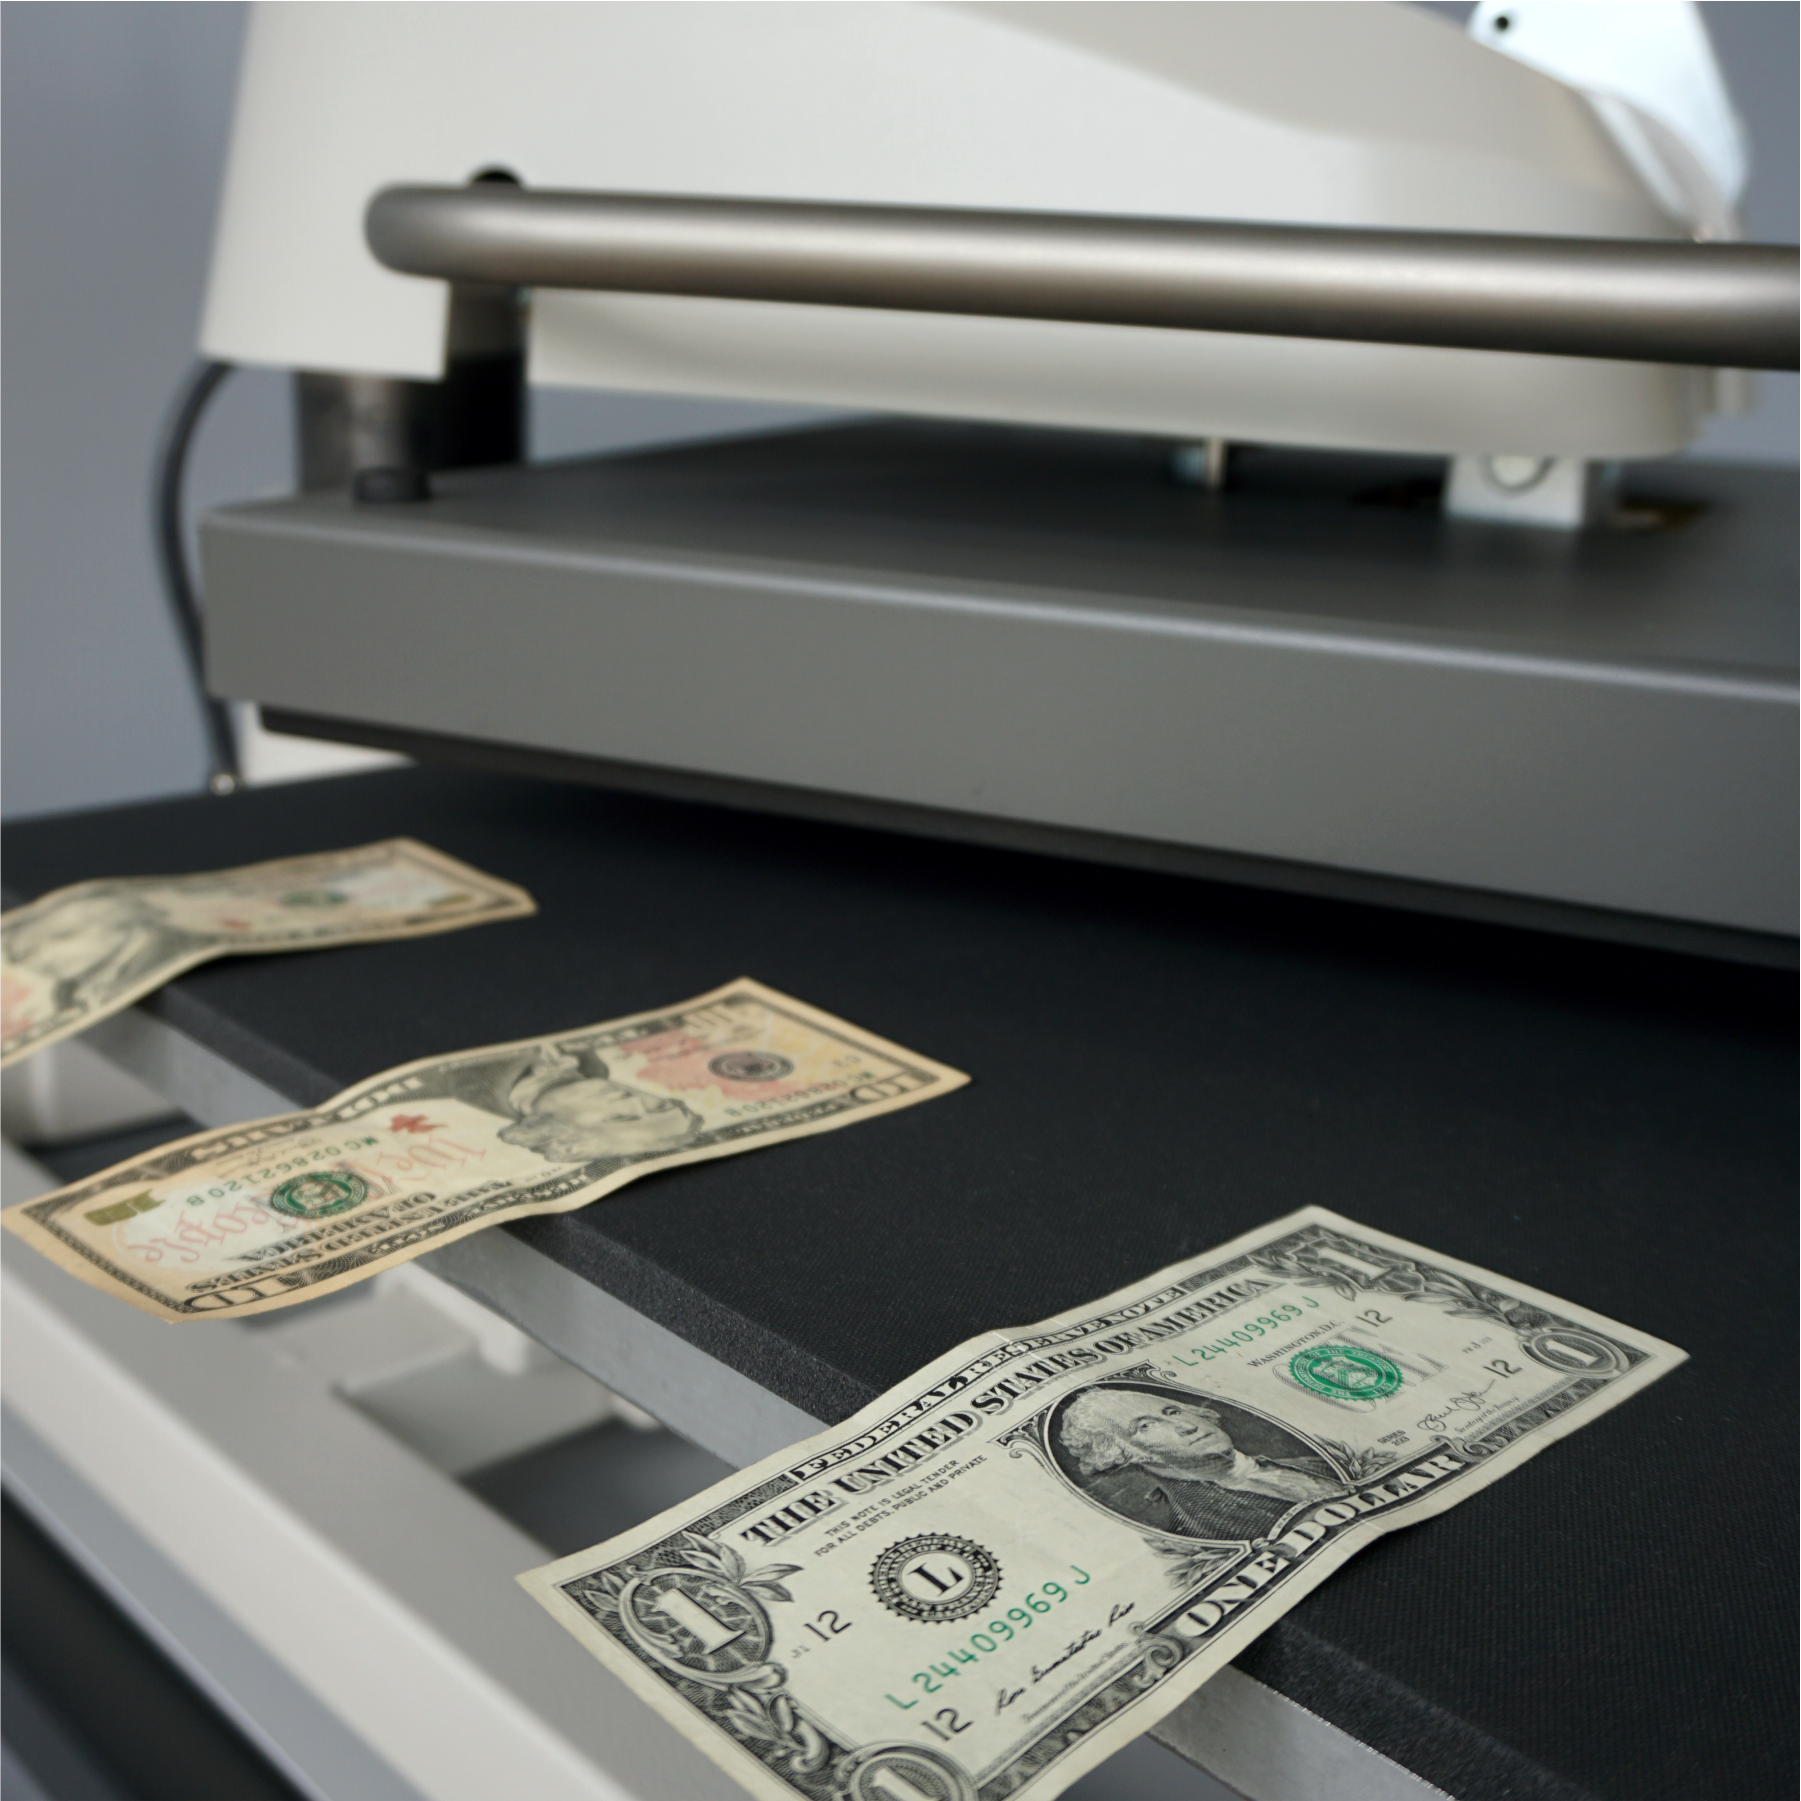
Check your heat press for accurate, consistent pressure using the dollar bill test.

With the platen closed, tug on the dollar bills. None of them should remove easily.
TIP: If you are having trouble applying a heart region, check for pressure issues. Many times, this application is on the outer edge of the platen where pressure can be lower than in the center of the platen.
4. Transfer was not applied long enough
If your temperature or pressure is slightly off, you may be able to compensate by increasing the dwell time. Start with an extra 5 seconds and increase incrementally until you achieve a successful application.
5. You used a Teflon cover sheet
It is generally not recommended to use a Teflon cover sheet when applying screen printed heat transfers. The Teflon will act as a heat barrier, decreasing the application temperature as much as 15 degrees. If you must use this type of cover sheet, you will need to compensate by raising the temperature 10-15 degrees.
6. There was an obstruction on the platen
Check to make sure all obstructions on the garment are off of the lower platen. This includes things like seams, zippers, buttons, and straps. These common accessories can block the top platen from providing the right amount of heat and pressure to the transfer.
If you can’t avoid these obstructions, you will want to raise the print area by putting a Teflon pillow or mouse pad under the garment. Be sure the area is raised above the obstruction and that the pillow or pad is slightly larger than the transfer you are applying.

To avoid the straps on this cotton canvas bag, we used a Teflon pillow insert just larger than the transfer.
TIP: Choose a heat press that offers interchangeable platens that can help you reach smaller print areas and avoid annoying seams.
7. The transfer was under-cured during production
If you’ve ruled out all of the above, it’s possible the transfer was under-cured during application. Just like your heat press can lose heat without you noticing, so can the dryer belts used to gel-cure the ink on your custom transfers. Again, check with your supplier. They can test-print an archived transfer and either confirm or rule out the possibility that it was under-cured during production.